


| Measurement | Value |
|---|---|
| Material | Die cast zinc, steel, and plastic |
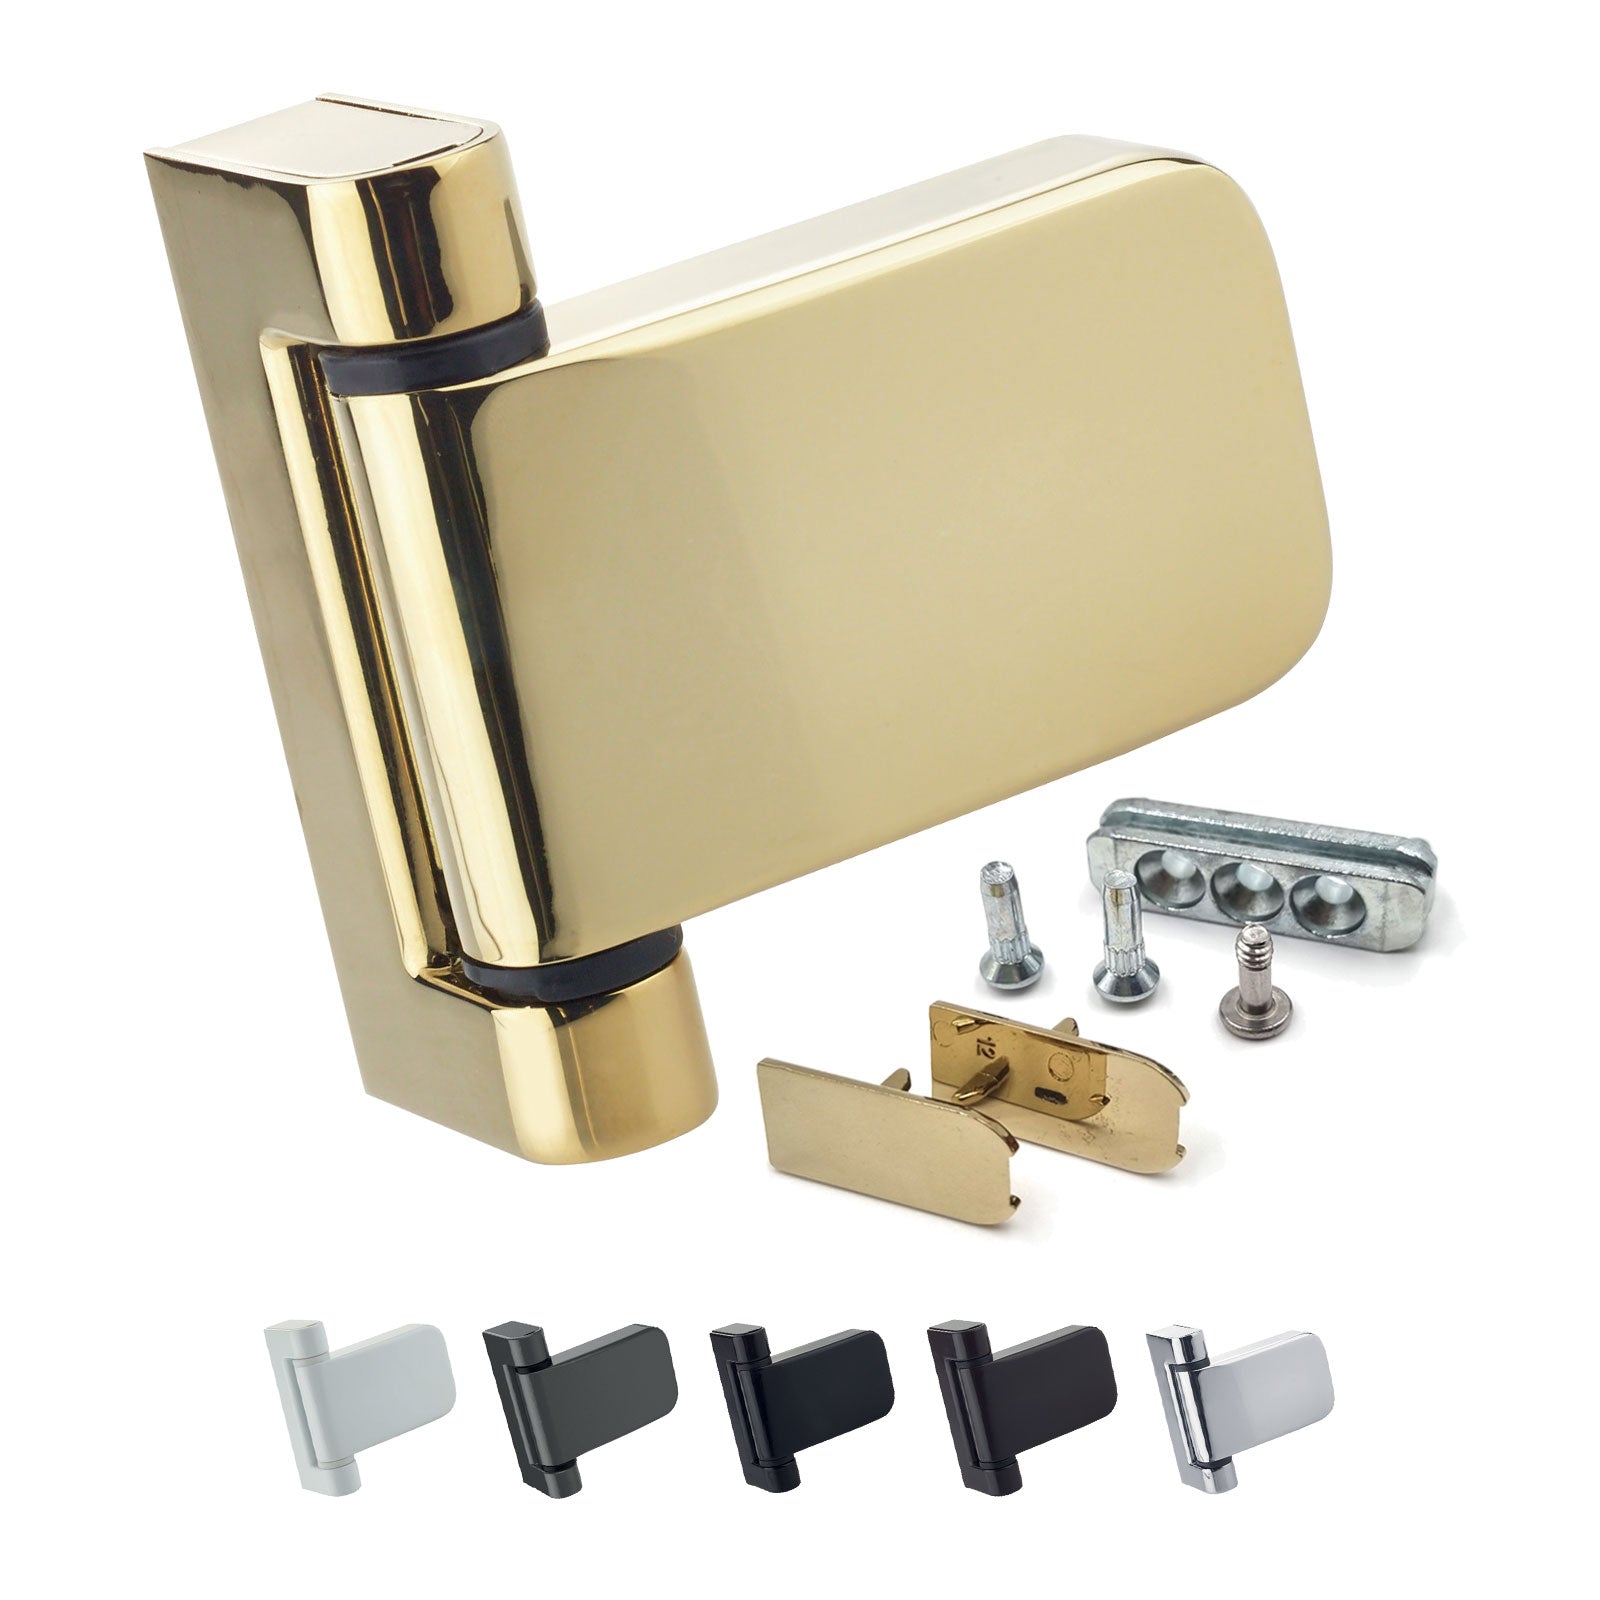
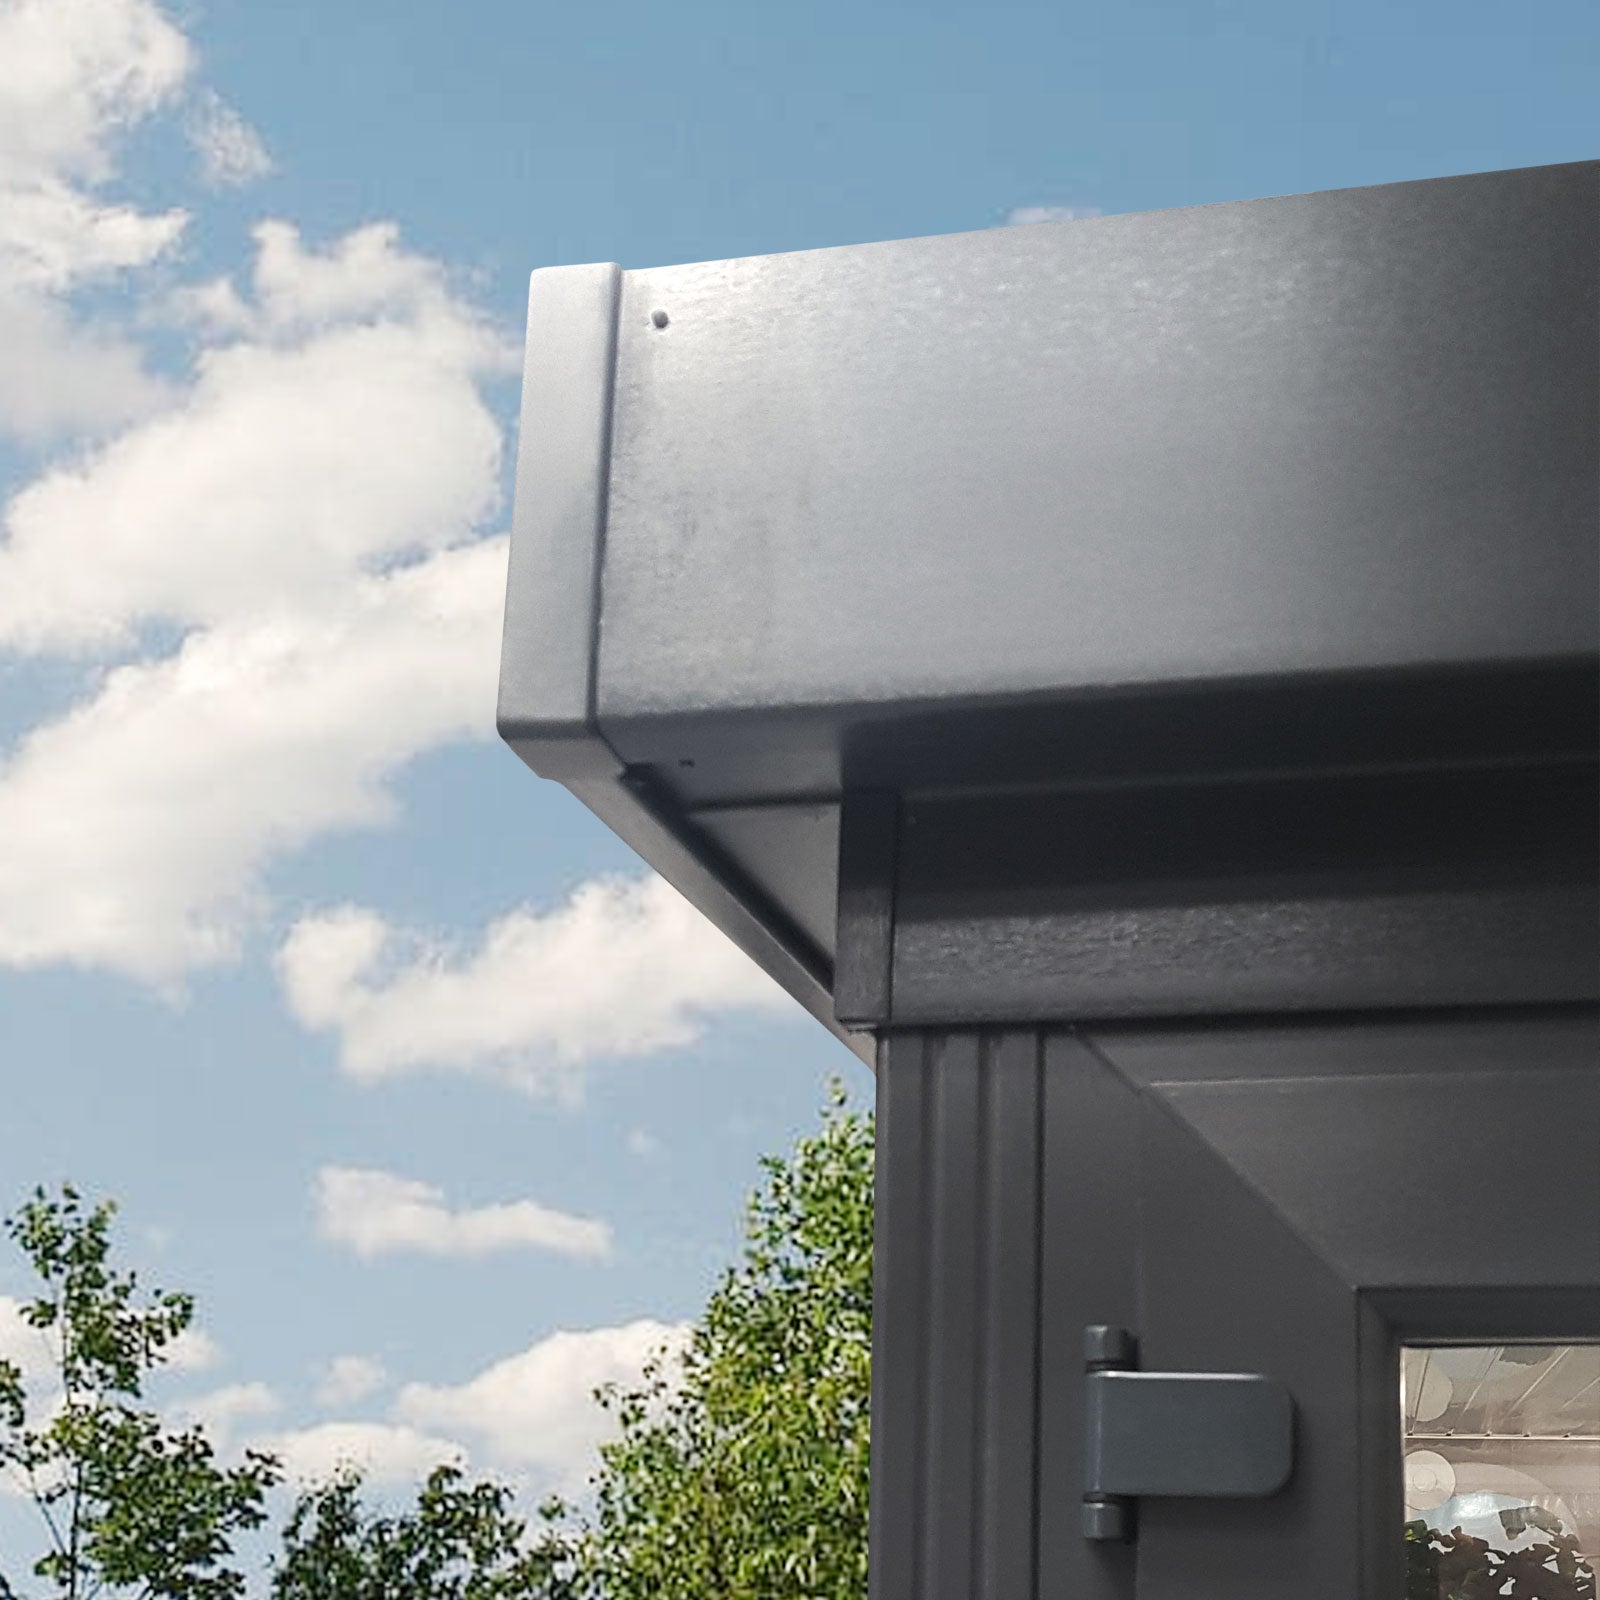
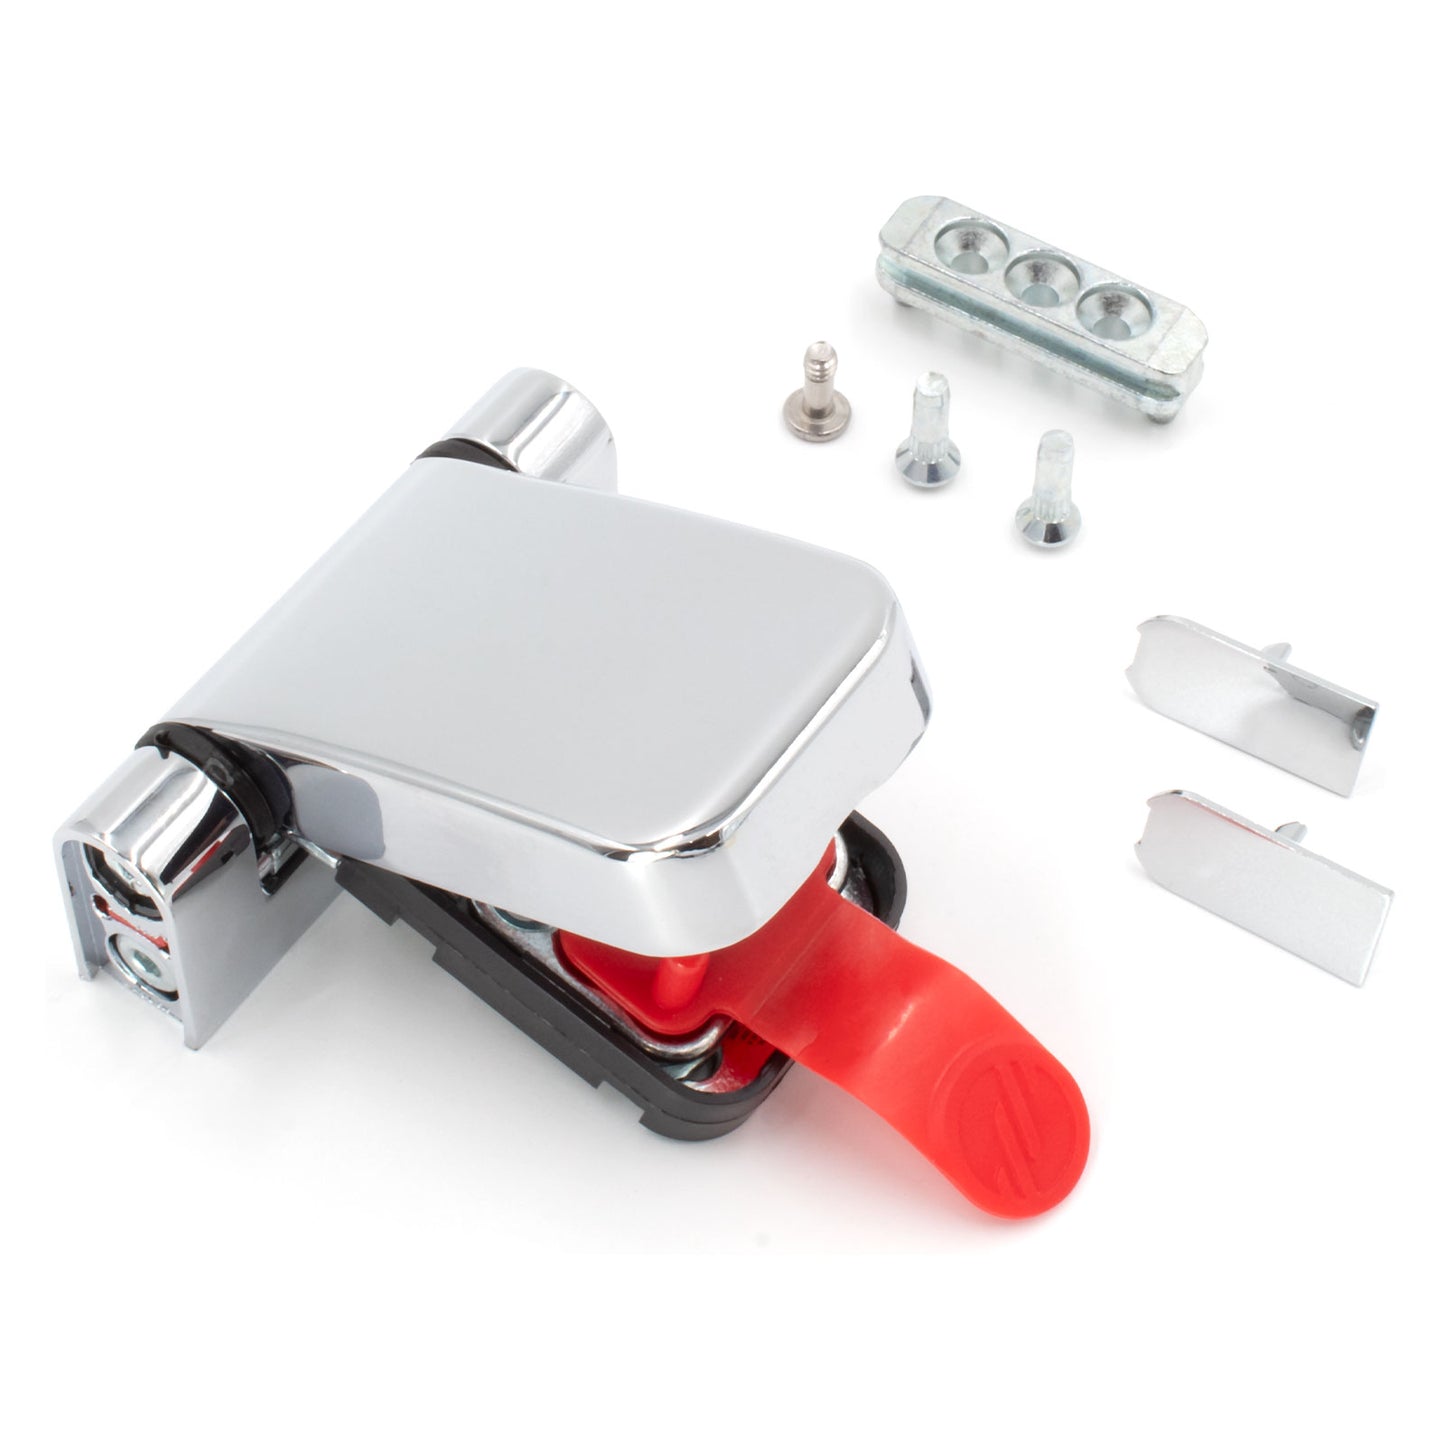
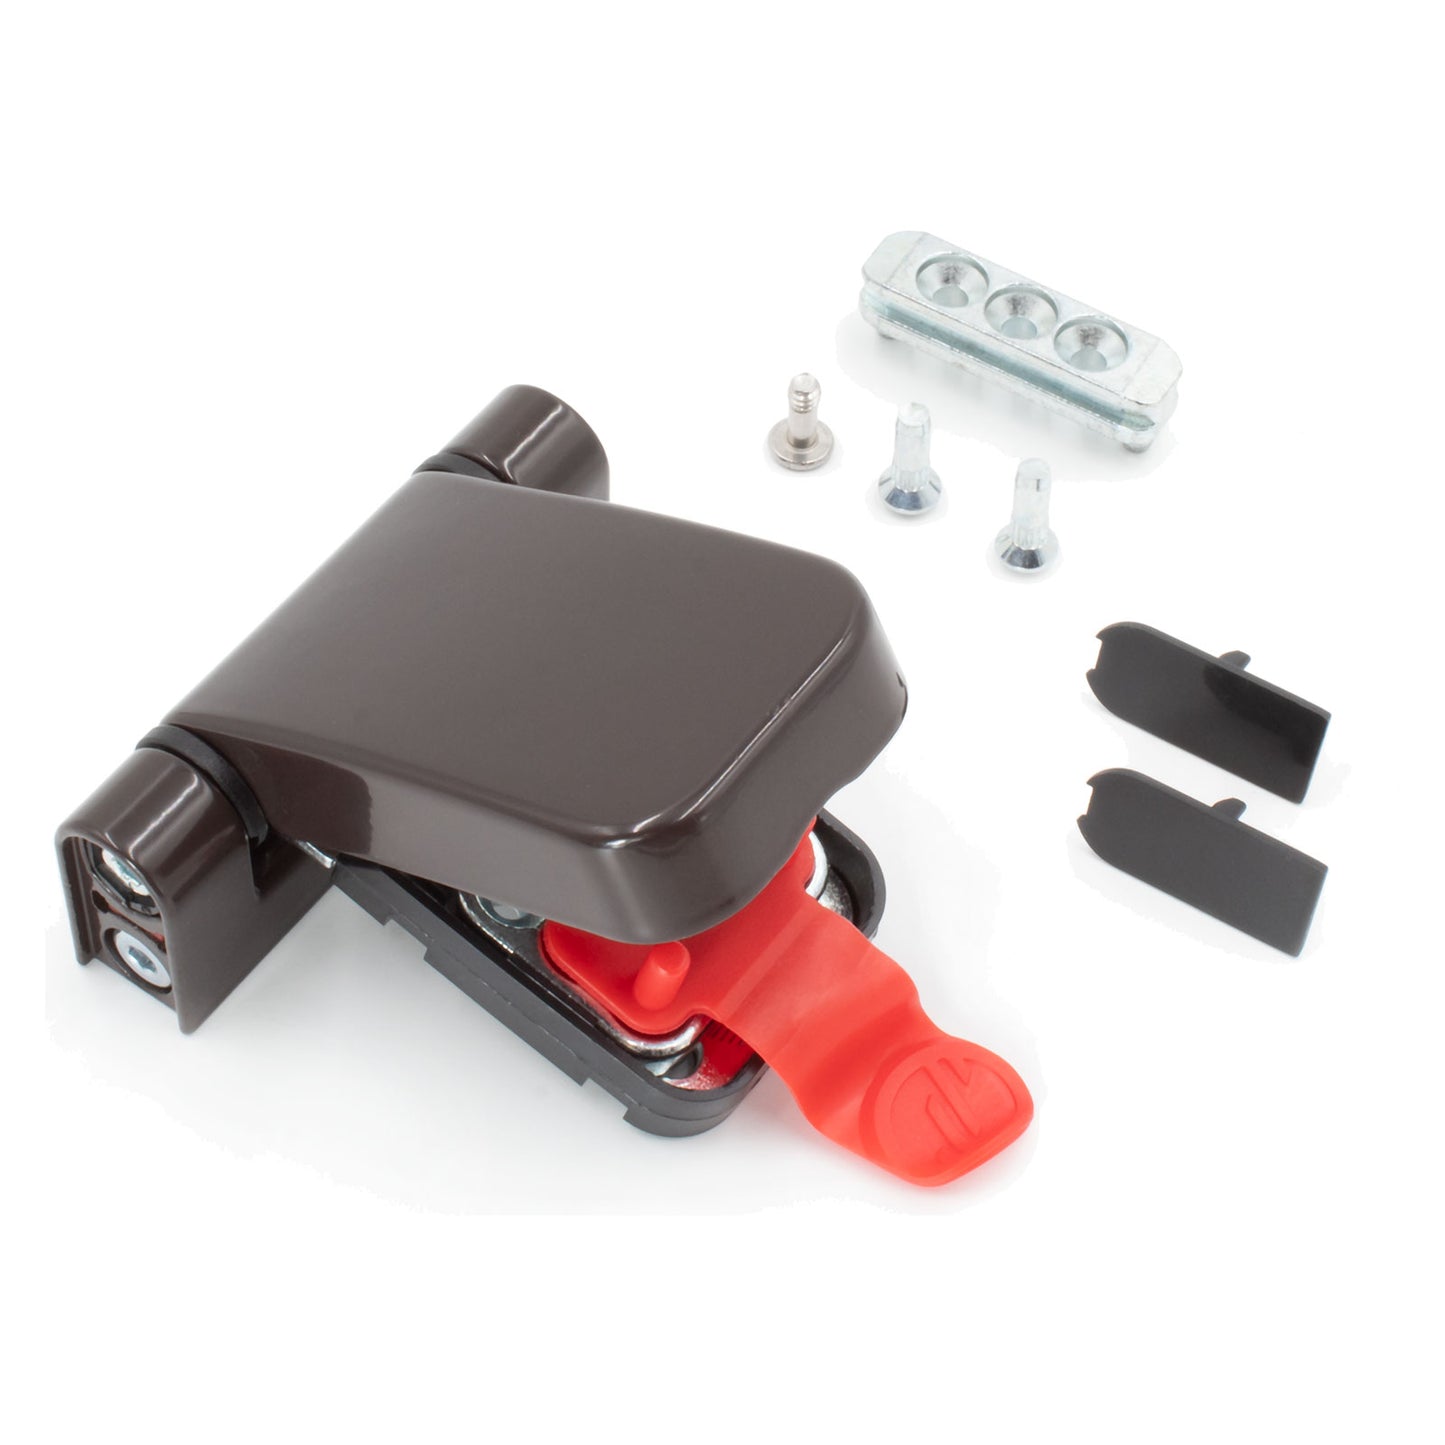
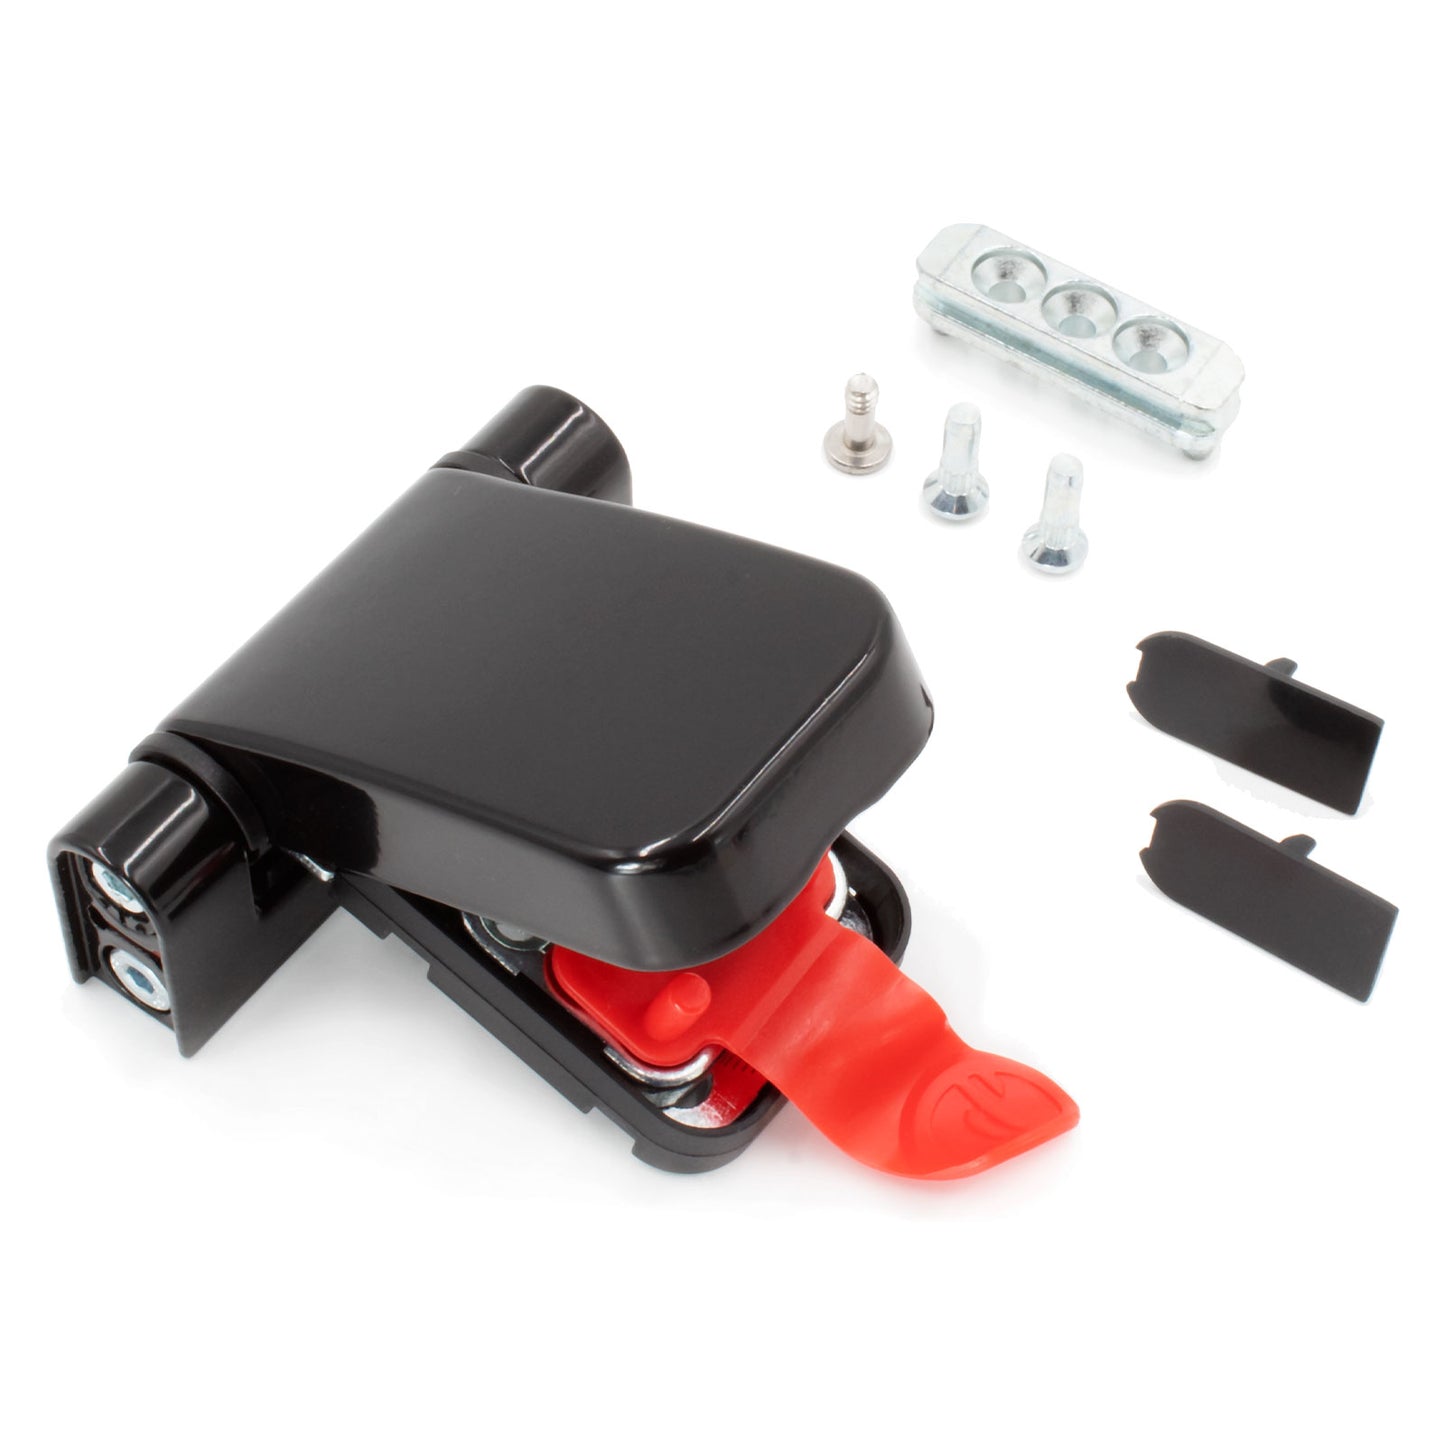
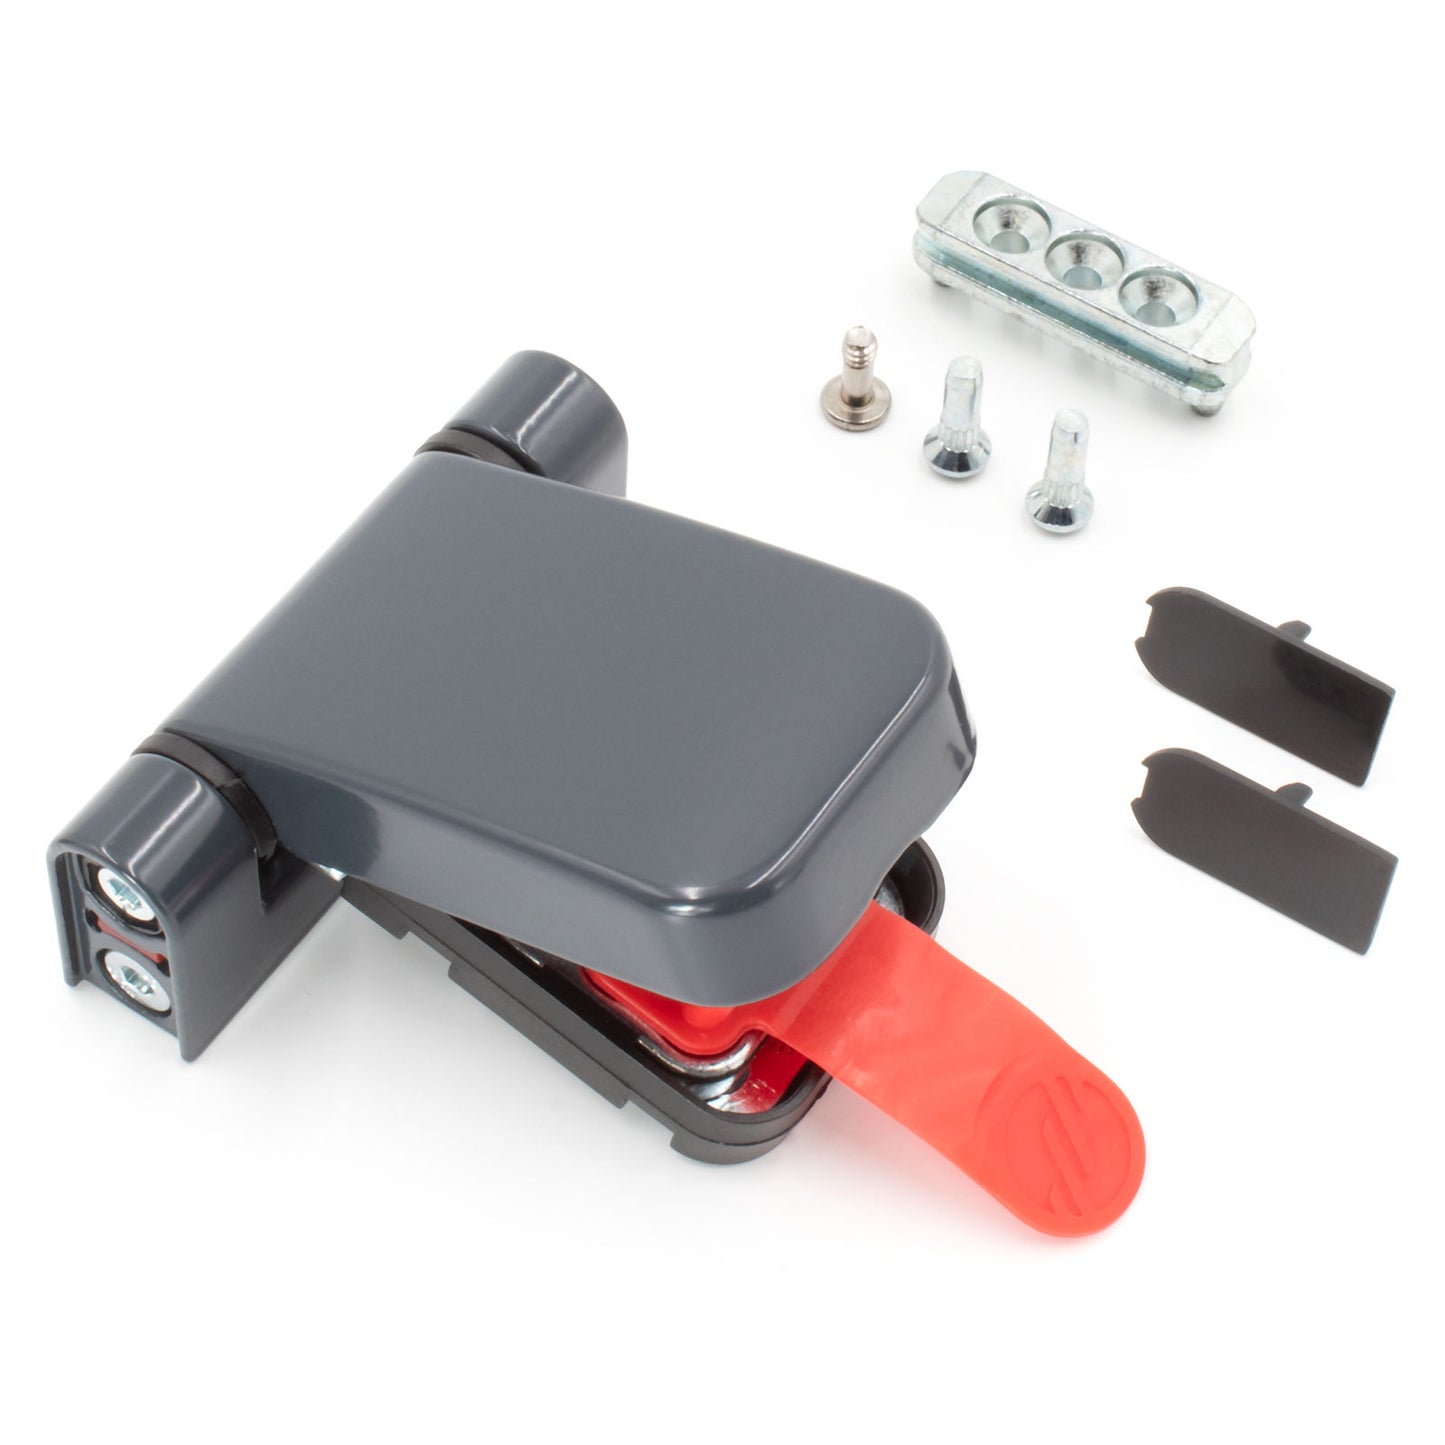
| Colour | White, Black, Brown, Anthracite Grey, Polished Chrome, Polished Gold |
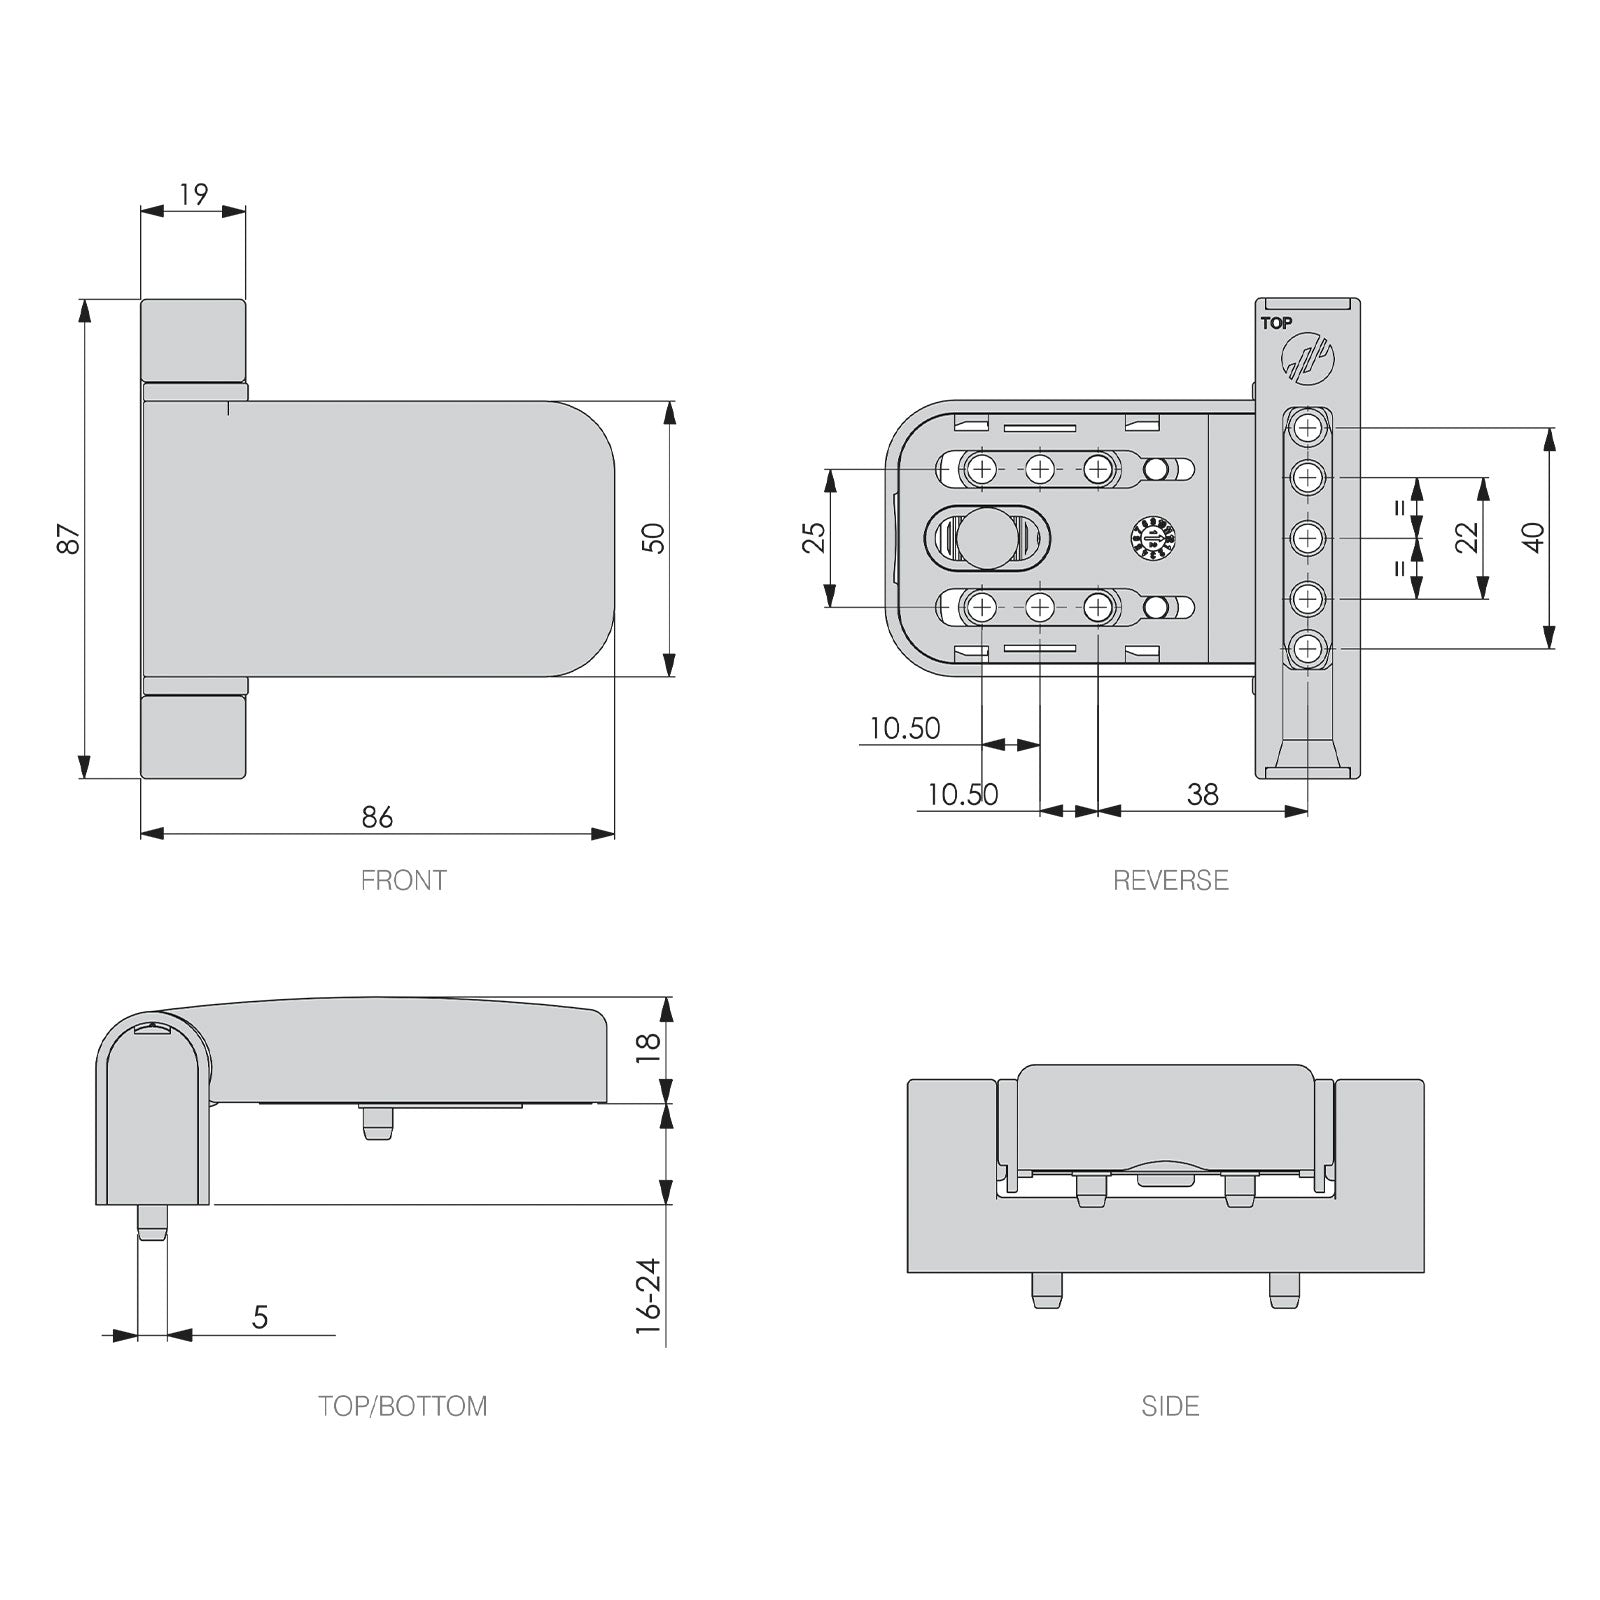
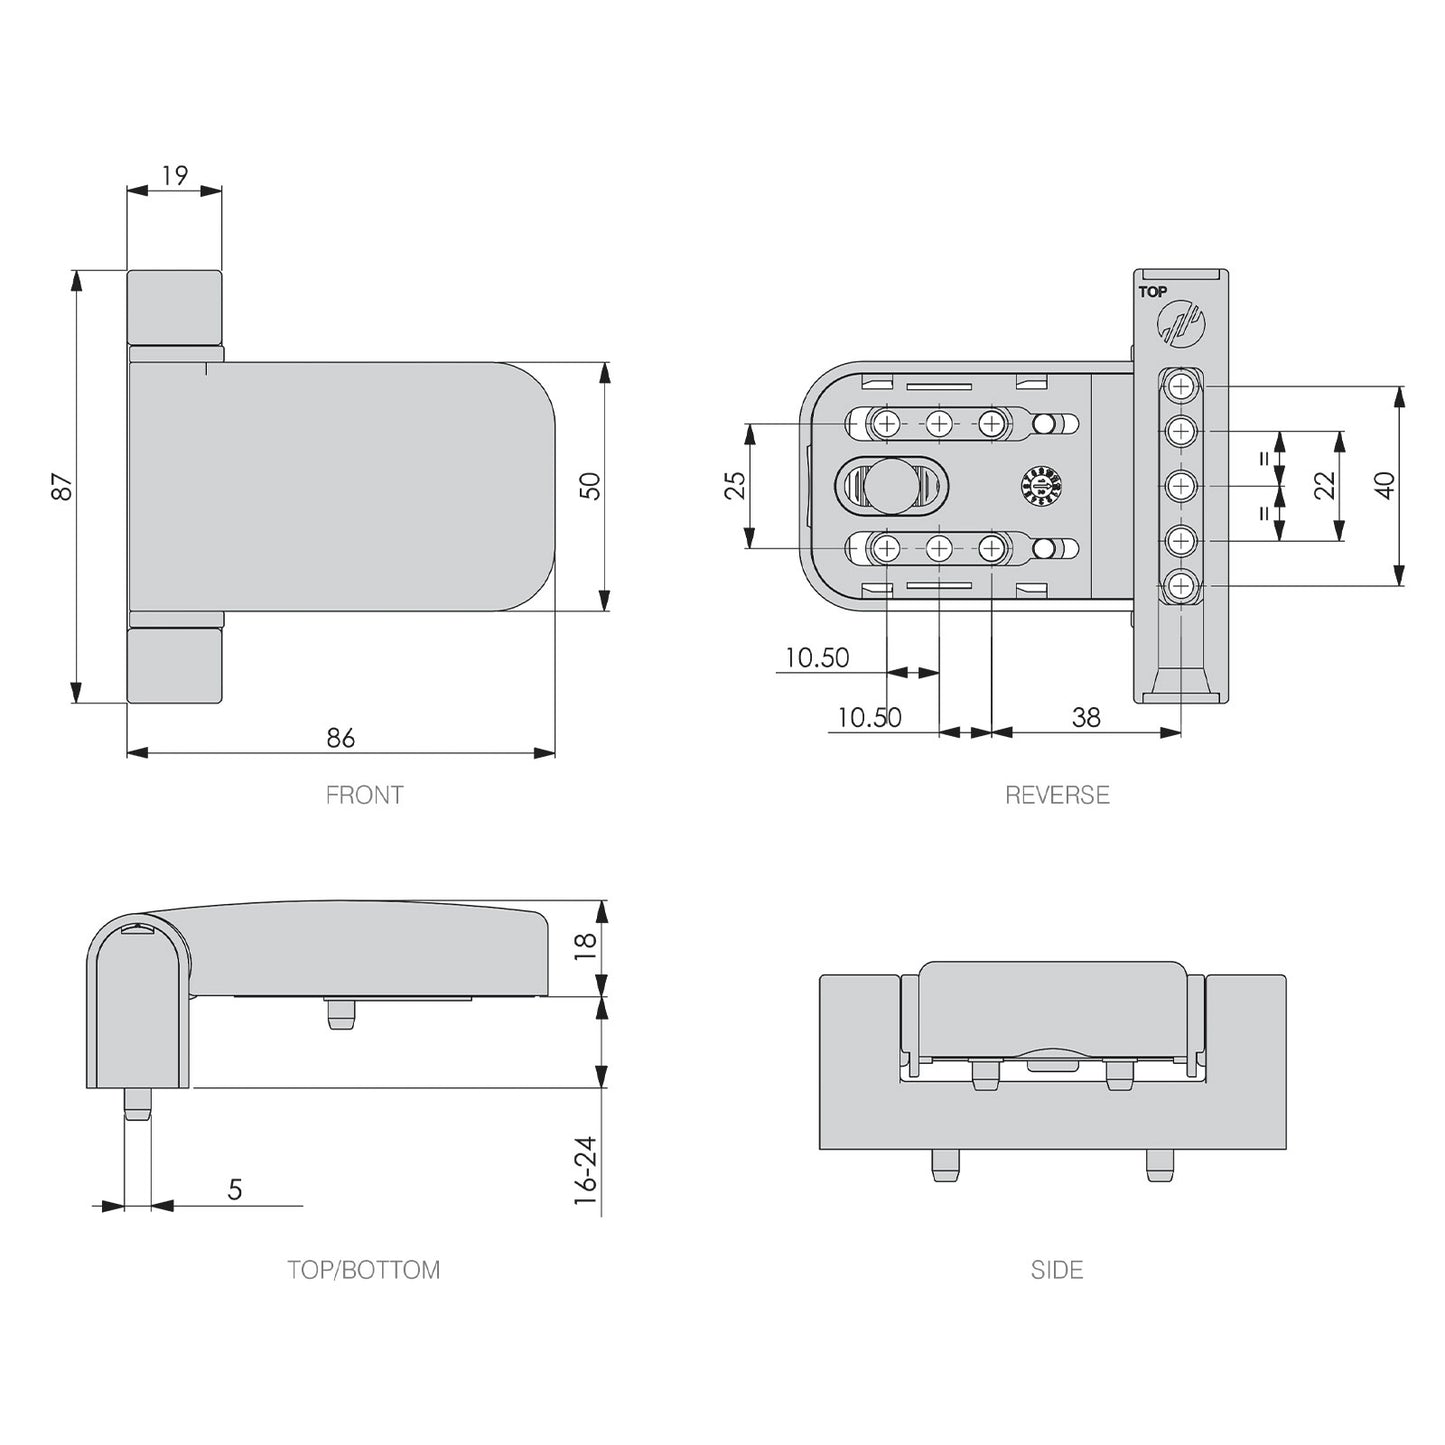
| Hinge Body Size (h x w x d) | 87mm x 19mm x 34-38mm |
| Hinge Leaf Size (h x w x d) | 50mm x 86mm x 18mm |
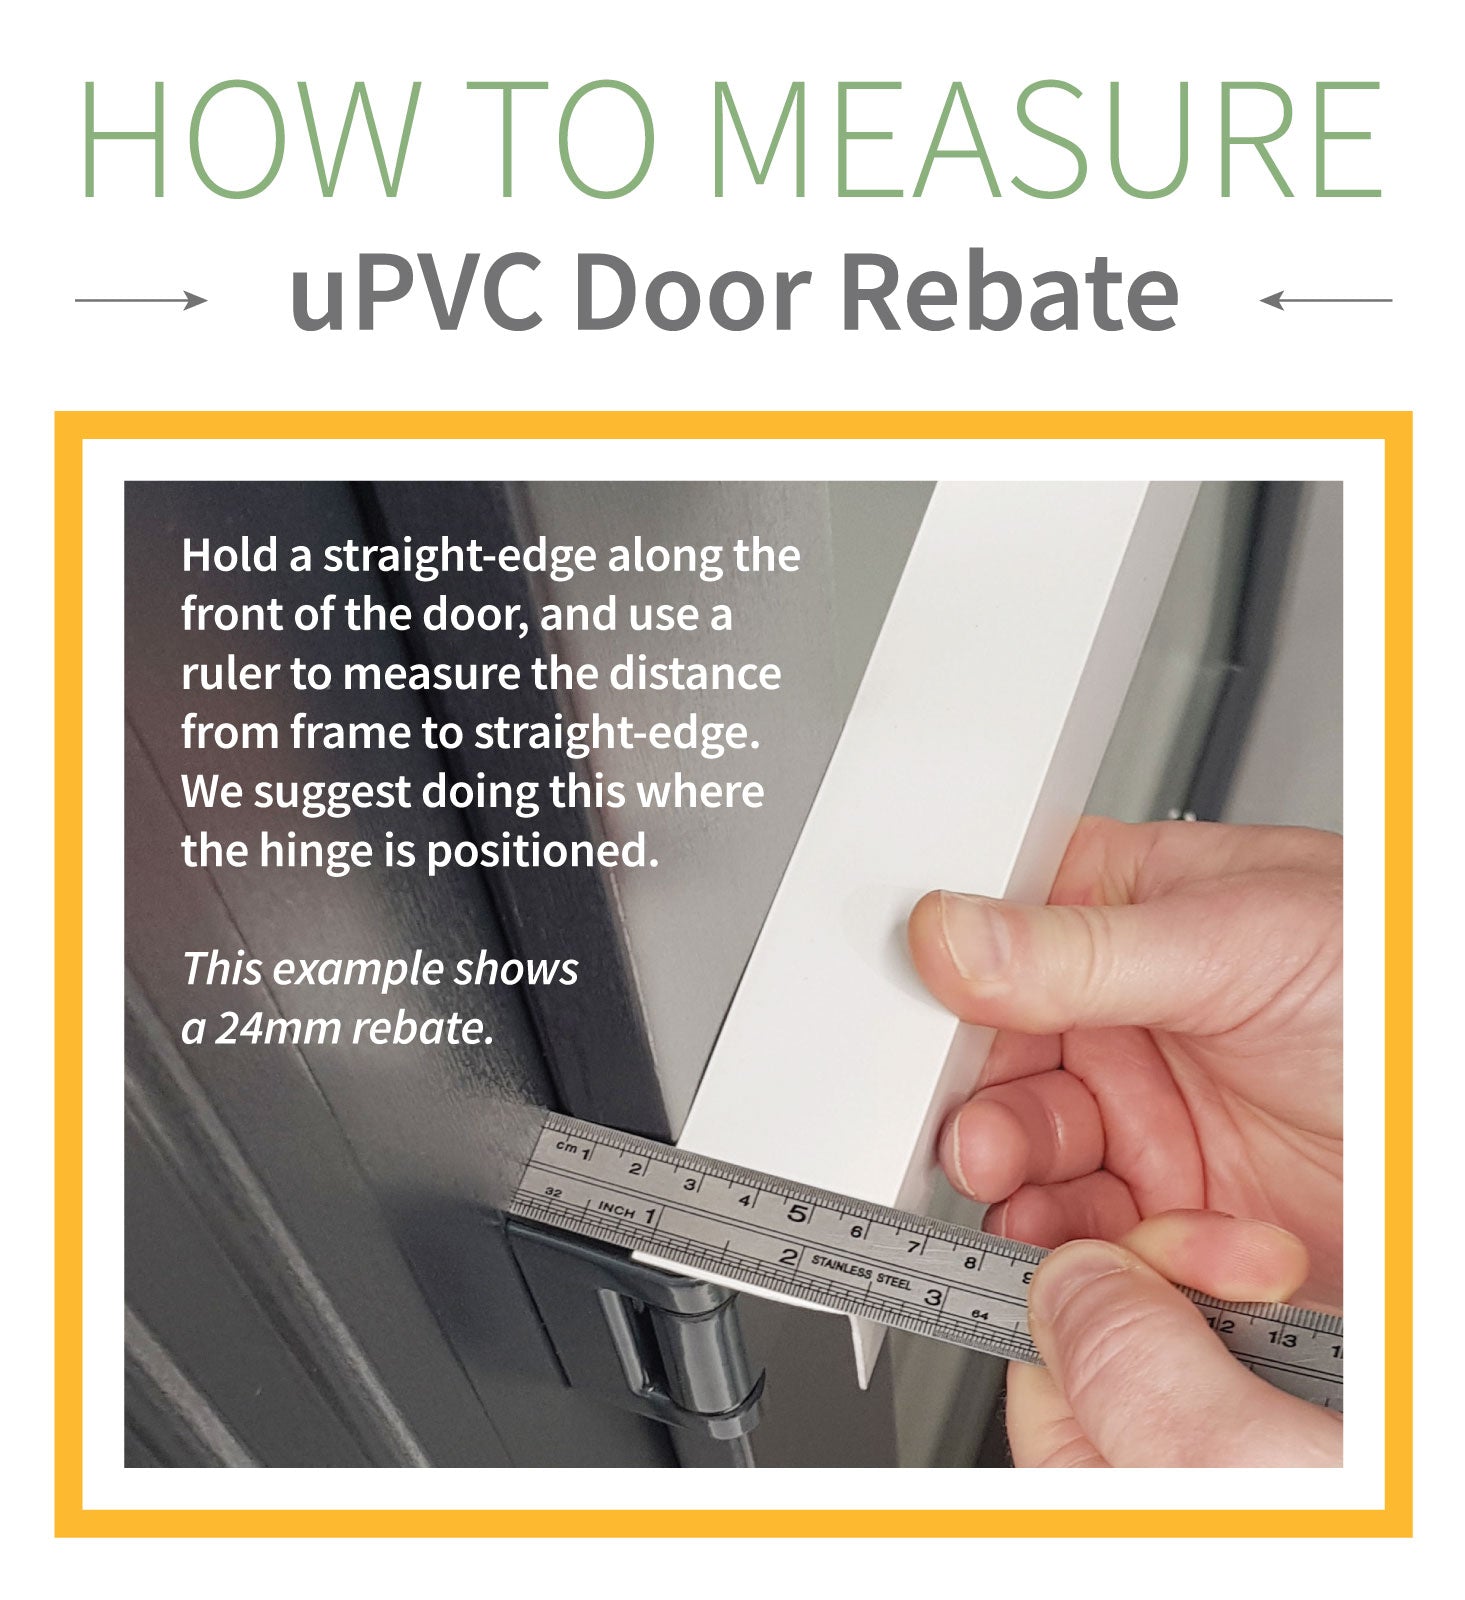
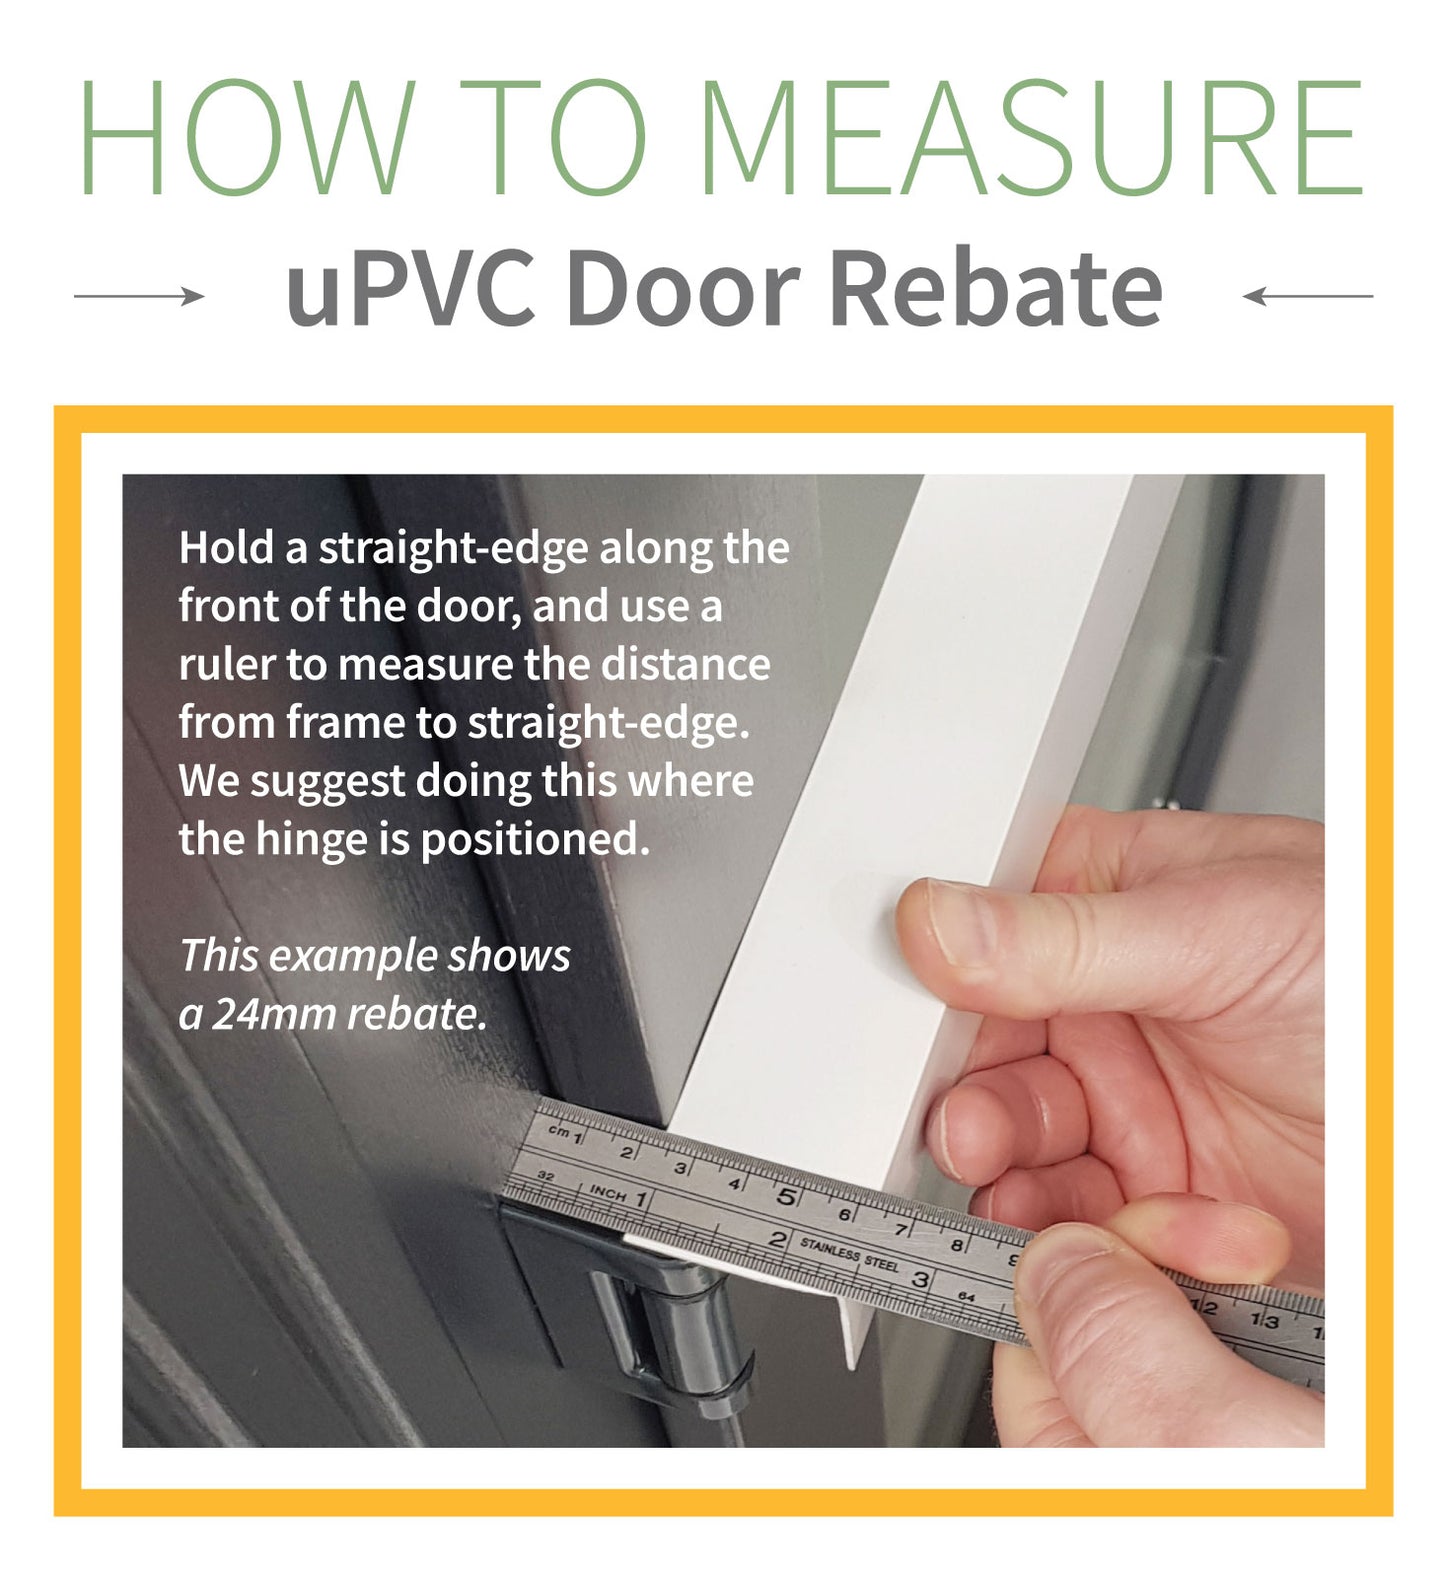
| Rebate Size | 18mm, 19mm, 20mm, 21mm, 22mm |
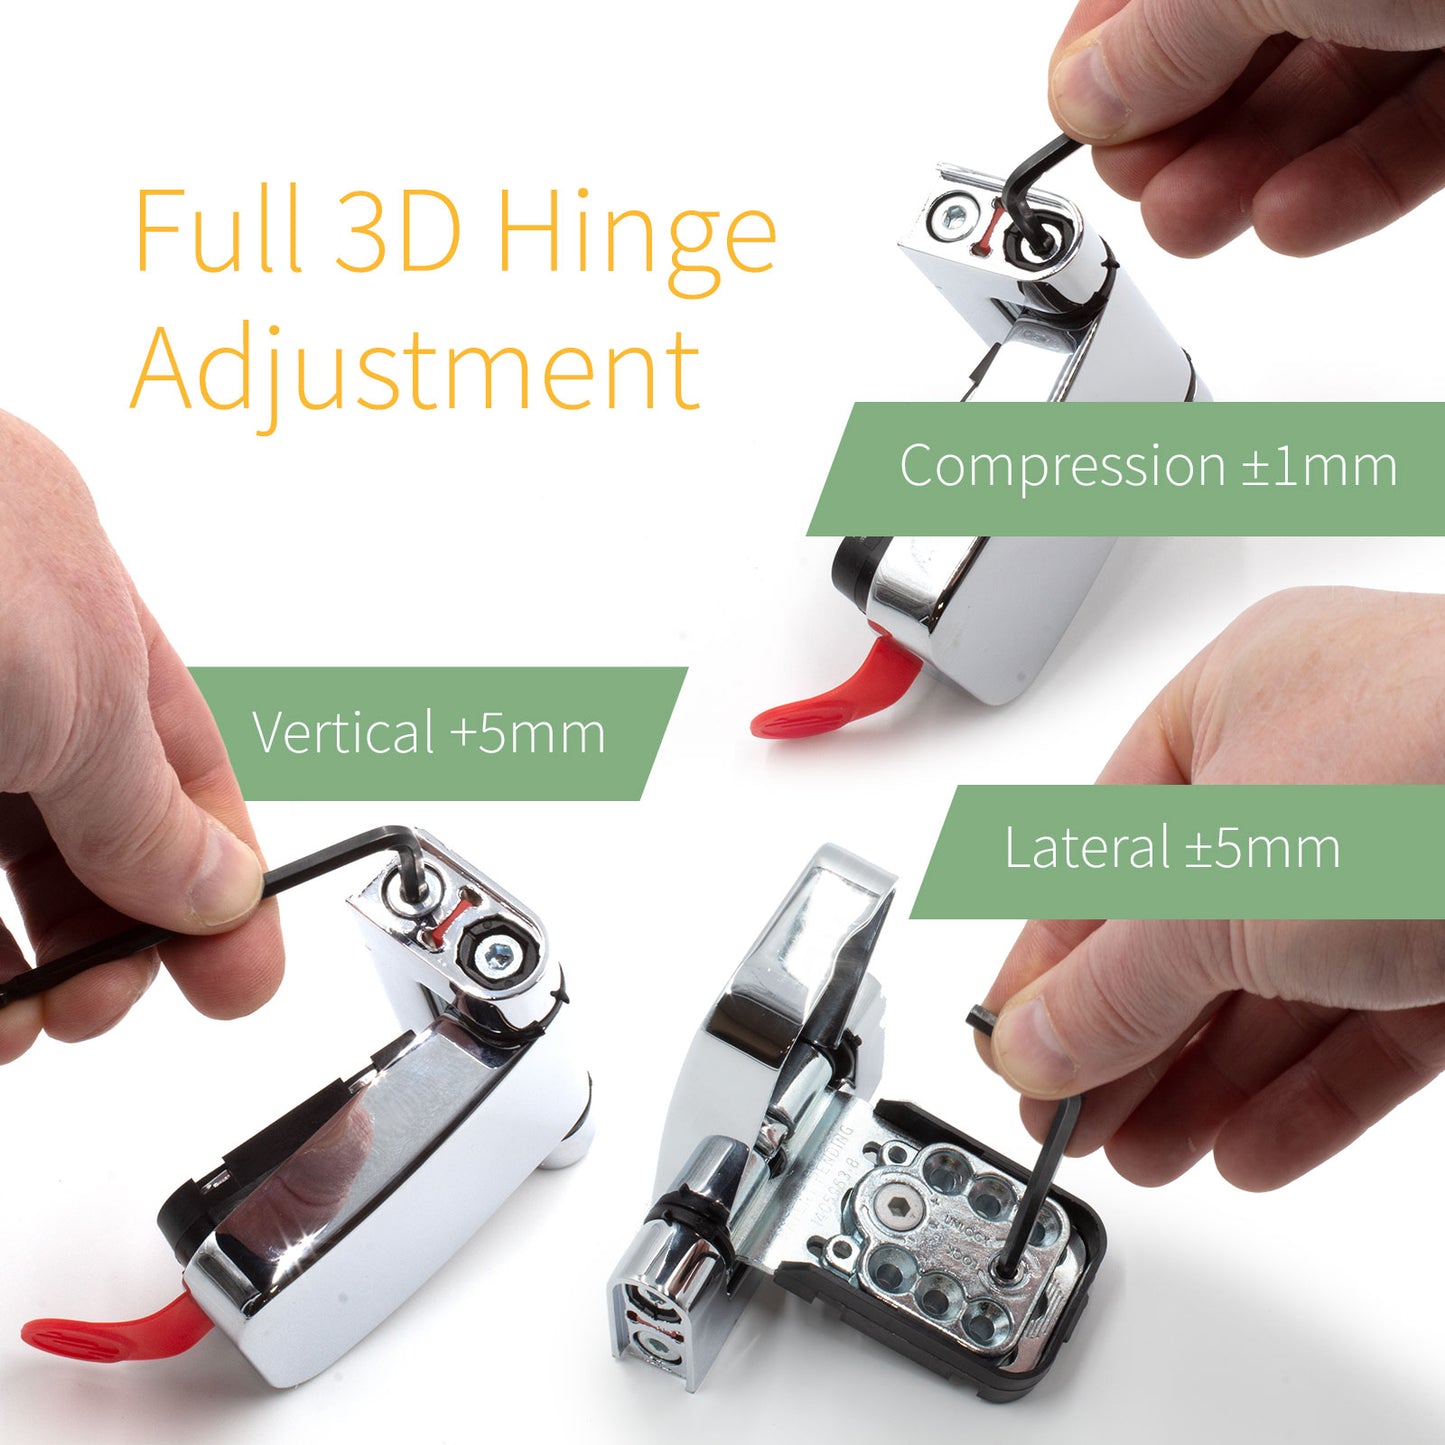
| Adjustment | Lateral (±5mm), Vertical (+5mm), Compression (±1mm) |
| Performance | 100Kg per hinge, and tested to 200,000 cycles under load |
| Guarantee | 25 Year Mechanical, 10 Year Painted Surface (White, Black, Anthracite Grey, and Brown), and 5 Year Plated Surface (Polished Gold, Polished Chrome) |
| Quality and Standards | BSEN 1670:2007 Grade 5 for extreme corrosion resistance BSEN 1935:2002 Grade 12 for extreme durability achieving PAS 24:2016 for enhanced security Police preferred specification - Secured by Design approved |

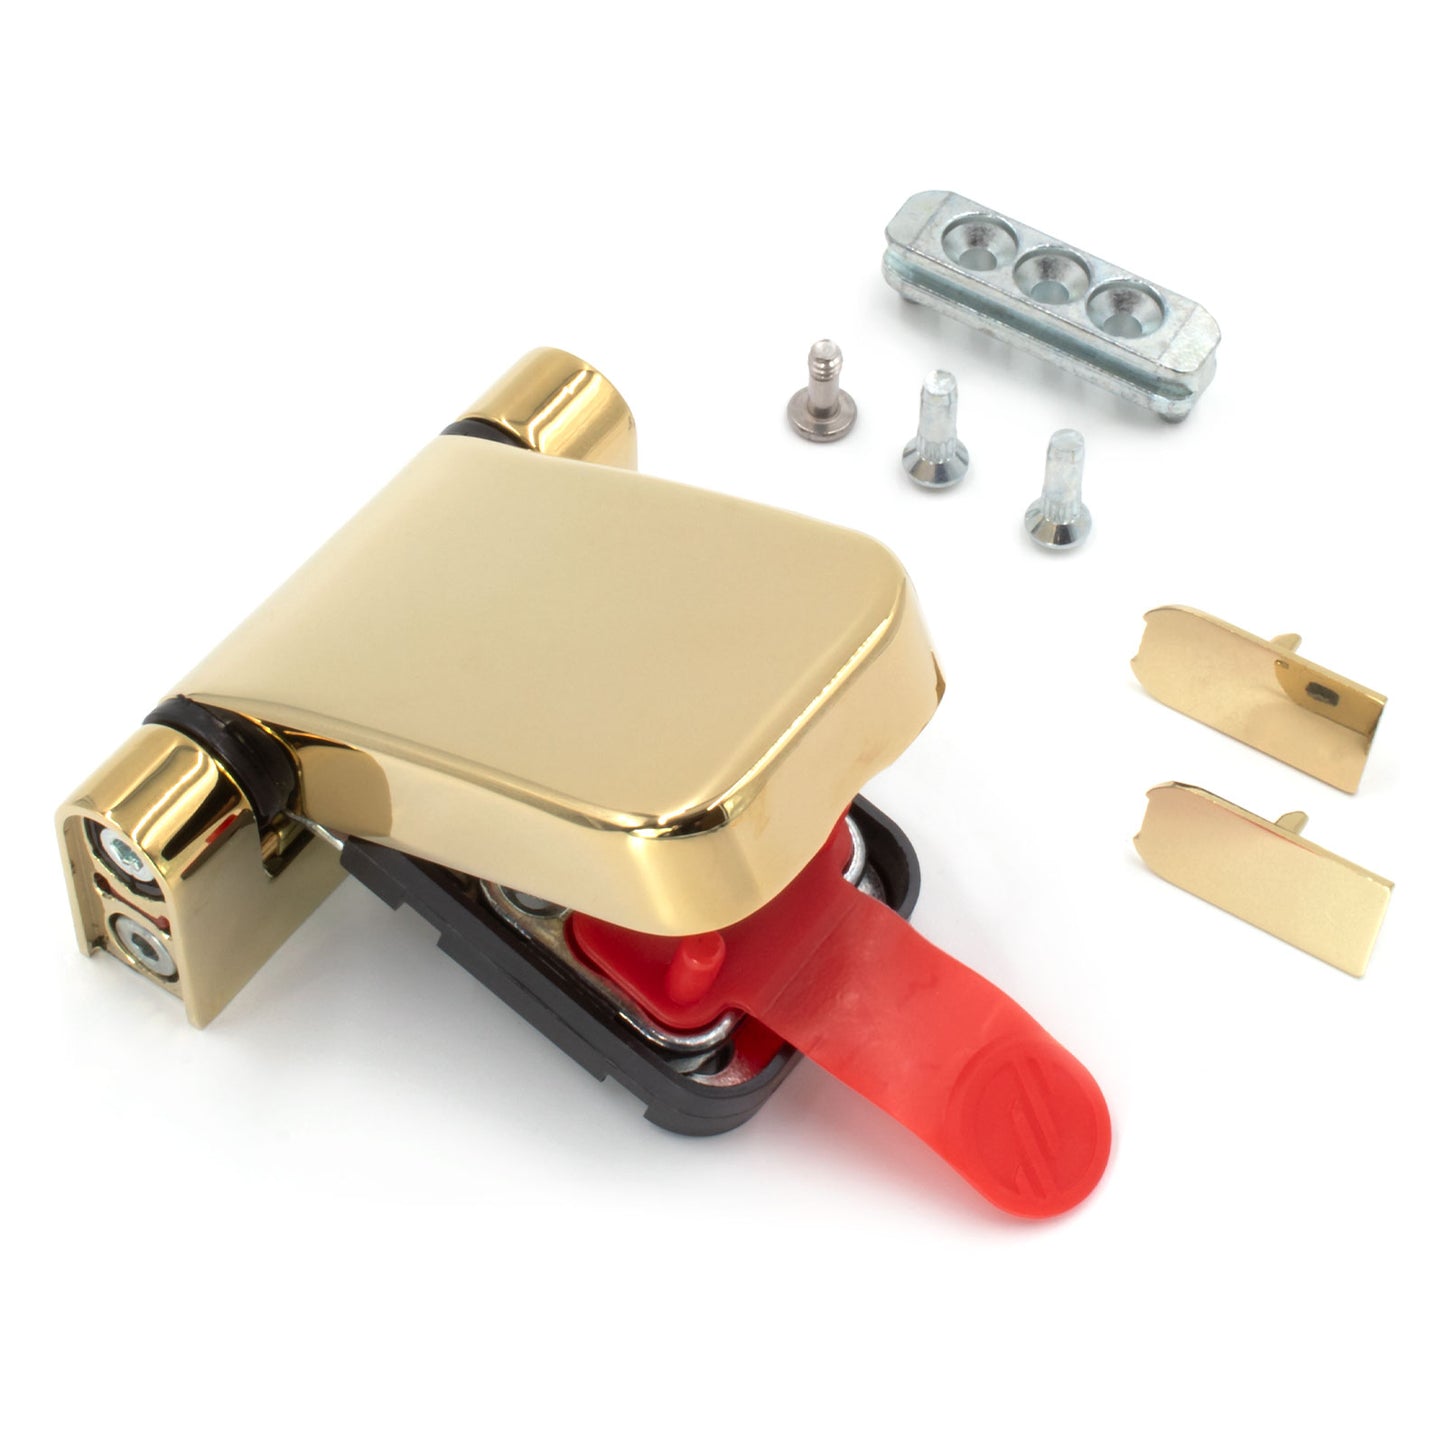
Mila ProSecure Flag Door Hinge
Mila ProSecure Flag Door Hinge
SKU: MLA-2194-1081
MPN:
26042
Regular price
£12.65
Regular price
Sale price
£12.65
Unit price
per
Tax included.
Shipping calculated at checkout.
Low stock: 5 left
Couldn't load pickup availability


Description
ProSecure uPVC Door Flag Hinge from Mila
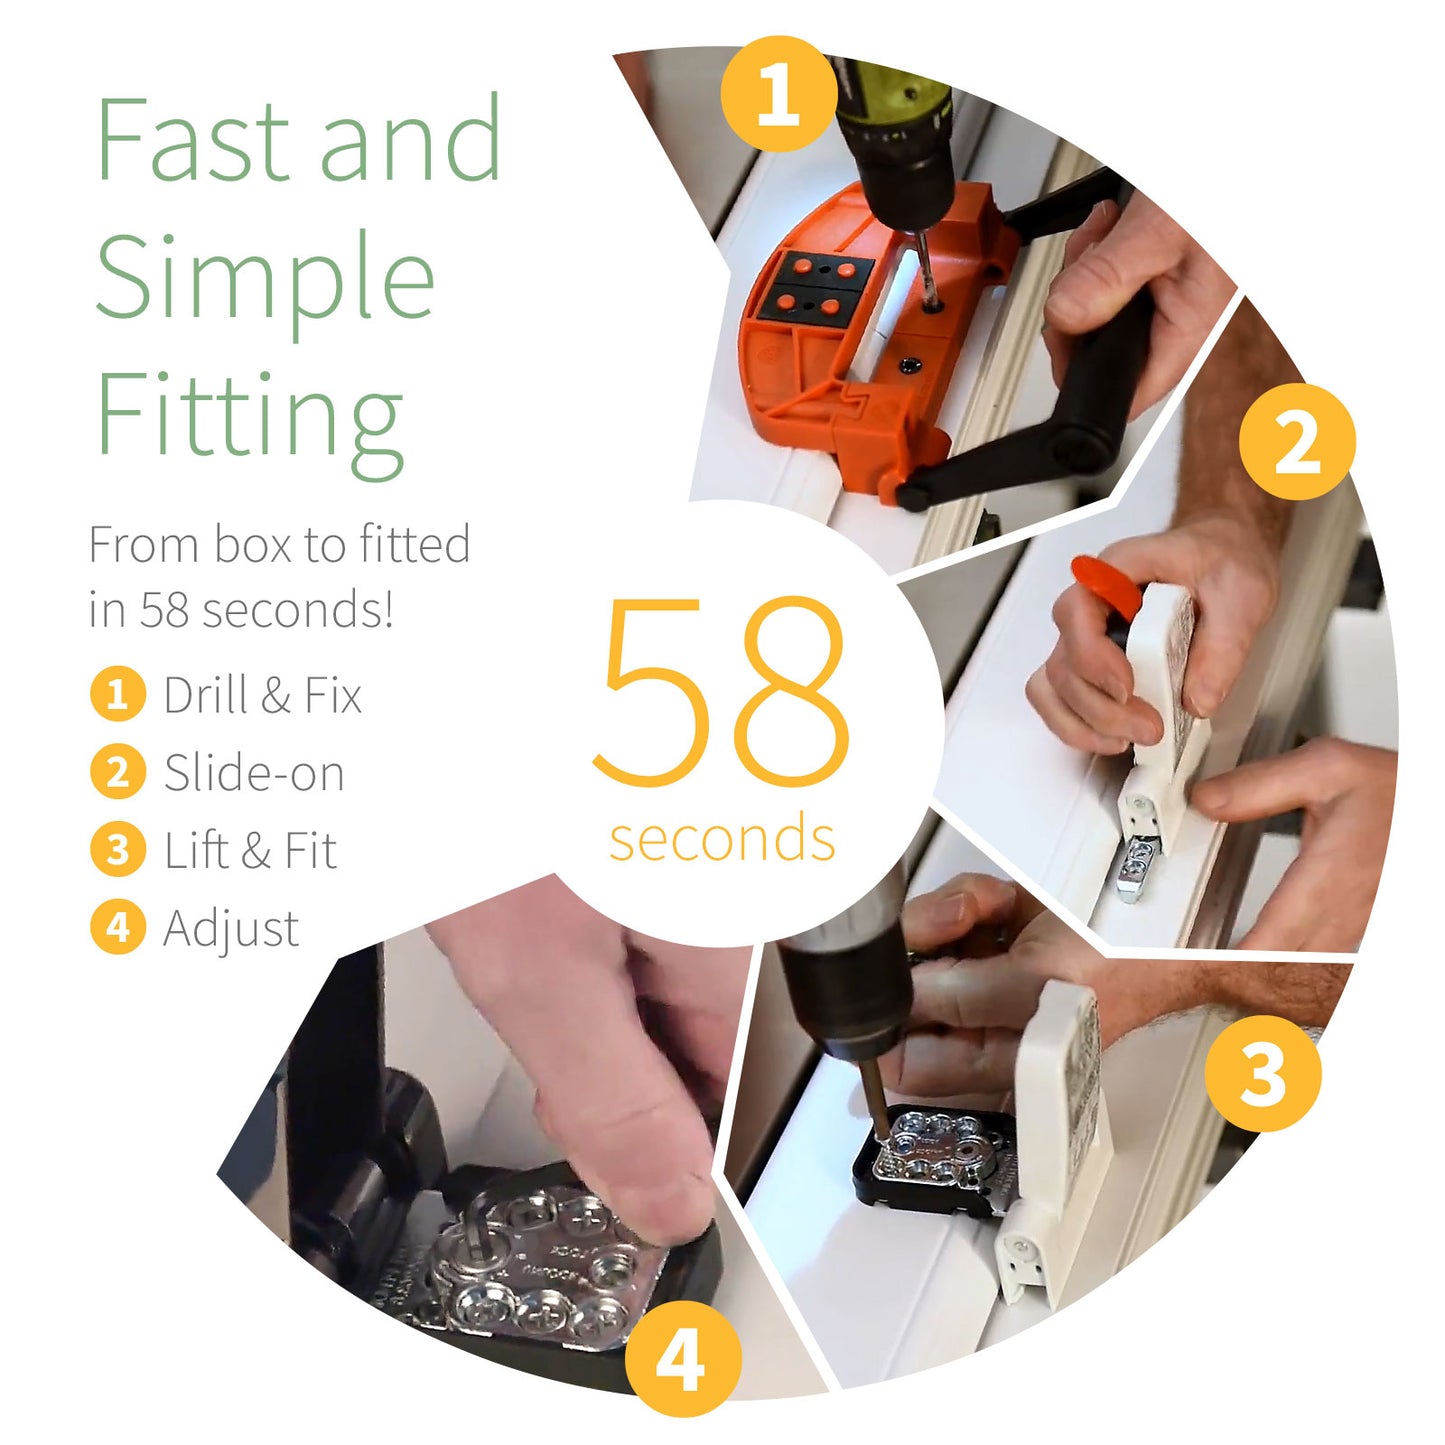
From box to fitted in just 58 seconds!
Designed for fast and simple fitting, the ProSecure uPVC door flag hinge is also inherently strong, and reliably secure. Choice of durable finishes and rebate size between 16 and 22mm.
The ProSecure security door hinge from Mila is the only hinge supplied ready to fit in one piece, which can slide straight onto the door frame. Fitting only needs two pre-drilled holes, so it is virtually jig less.
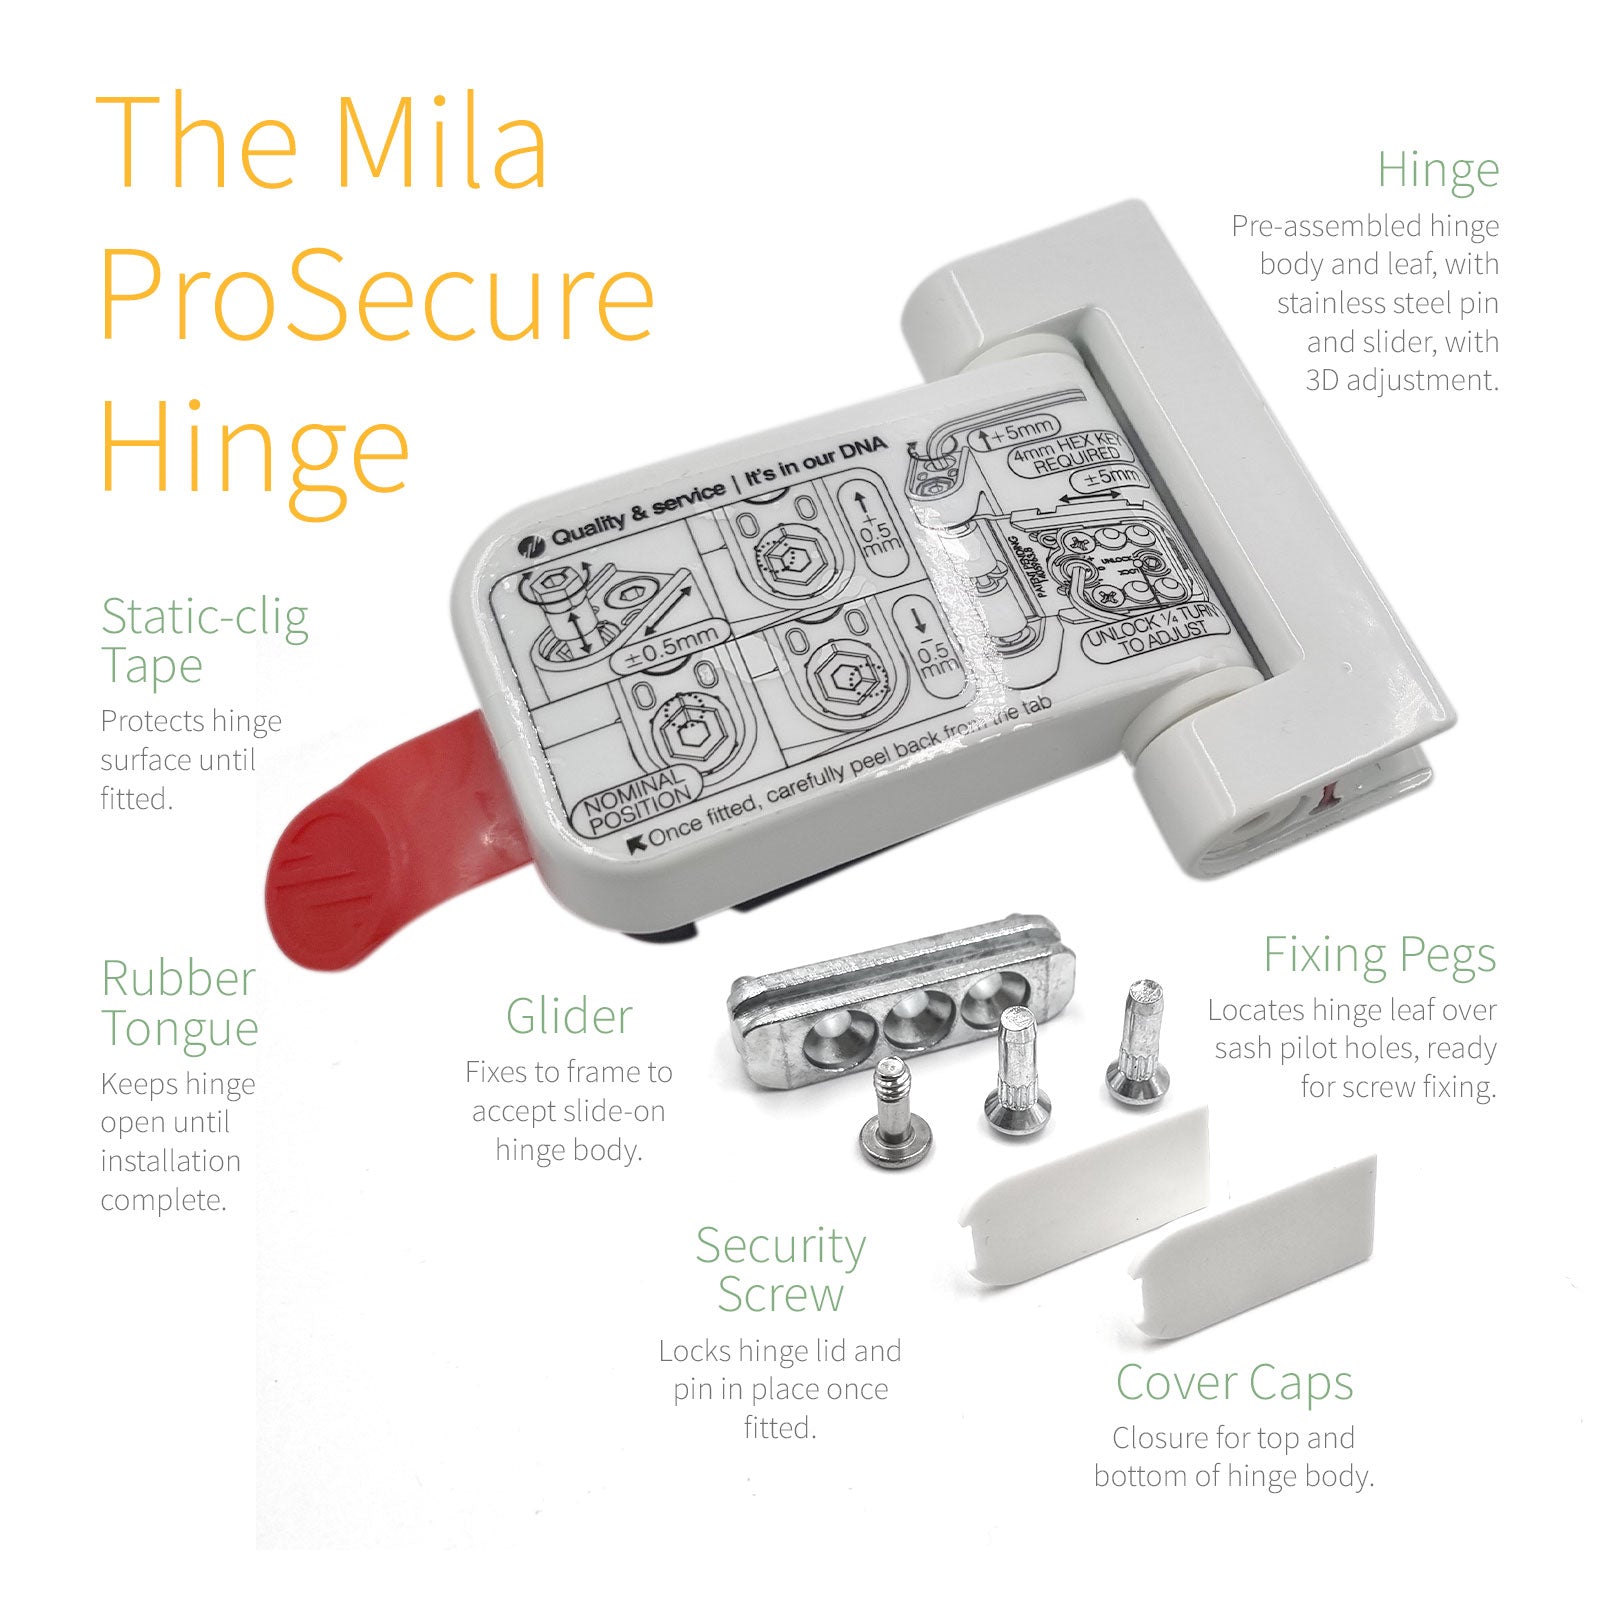
Features & Benefits
- Fit in under 1 minute - faster than any other security hinge
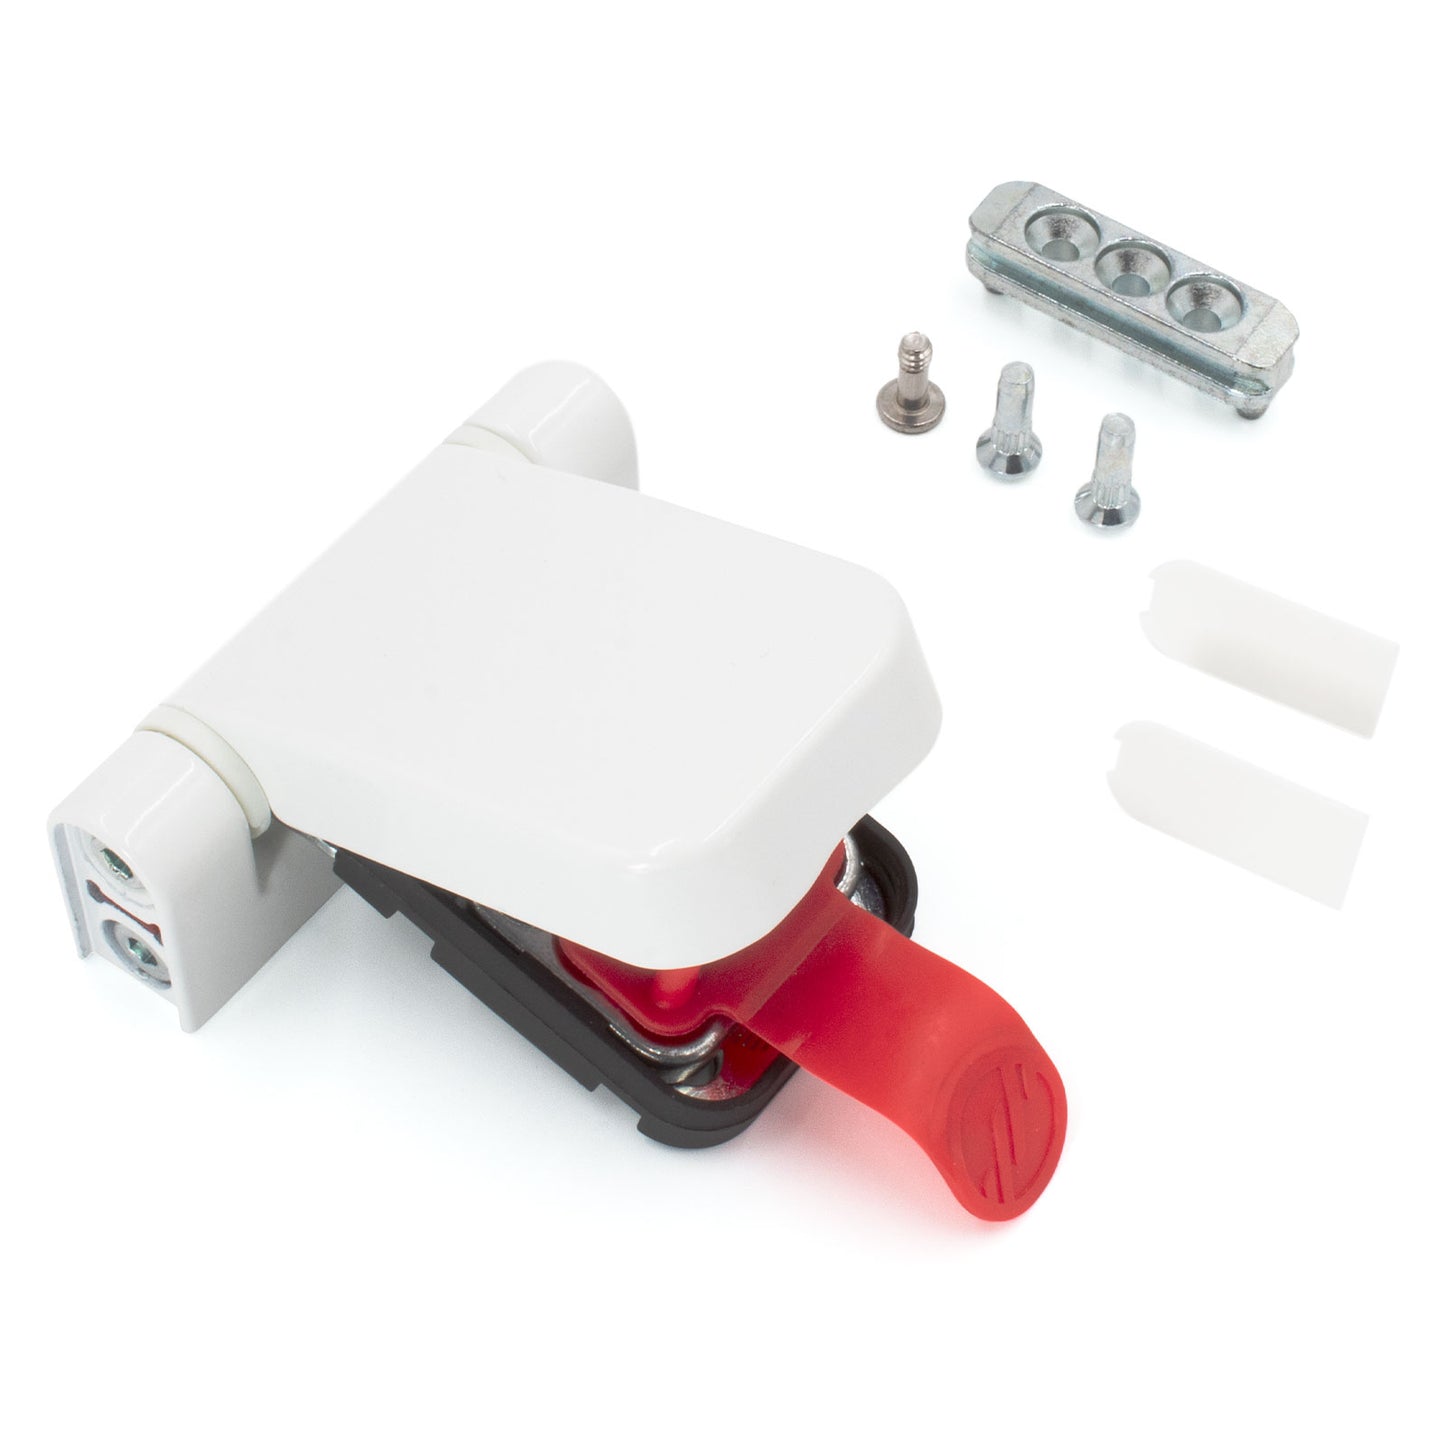
- Pre-assembled ready to fit - supplied as one piece
- Virtually jig-less fitting - needs only two pre-drilled holes
- Fully 3D adjustable - lateral, vertical and compression
- Choice of installation method - slide-on or front-fit
- Captive hinge lid - pivots open and closed for easy installation
- 25 year mechanical guarantee - a product you can trust
Designed and engineered to combine the strength of a flag hinge with the support attributes of a butt hinge, and fitted with static-cling tape to protects the hinge until you’re ready to use it.
DID YOU KNOW? When fitting the ProSecure flag hinge, the slide-on technique is the quickest and easiest method, however if the door is being fitted into low reveals, then front-fit by removing the steel hinge pin.
Specification
Contents
Fitting & Usage
Delivery
Reviews
Downloads